Welcome to Shenzhen Lijun Lighting Technology Co., Ltd.
 Tel:17304453873 曾总


Welcome to Shenzhen Lijun Lighting Technology Co., Ltd.
Tel:17304453873 曾总
A little bit of precipitation converges into a vast sea.
 Date:2021-06-07
 view:1219
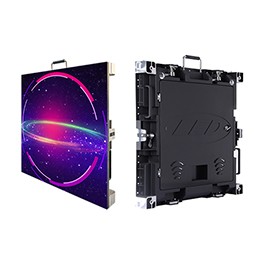
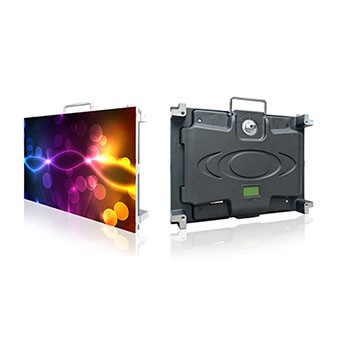
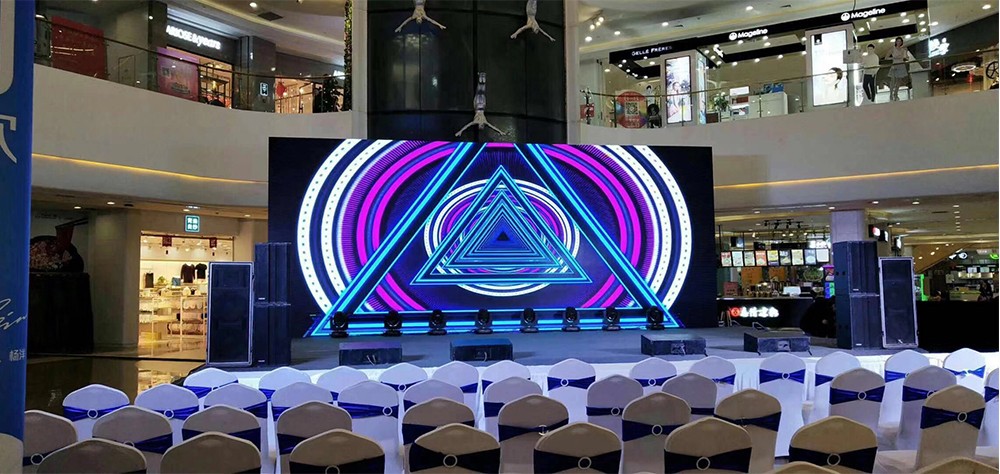
LED display screen, as a new media, the movement of luminous pictures and text, easier to attract attention, a large amount of information, updated at any time, has a very good advertising and notice effect. LED display screen is simpler than neon lights, easy to install and use, more changes in effect, and can update content at any time, so it is a good visual media for indoor and outdoor distribution. LED display screen belongs to high-tech electronic products, the price is relatively high, used to focus on the government and units. With the continuous progress of technology and lower prices, it is easier to assemble and maintain.
LED display screen as a low power consumption, large-scale real-time dynamic display information of the best tool, it can display computer-generated dynamic picture and text picture, LED display screen from the installation environment can be divided into three types, one is indoor LED display, two is outdoor LED display, three is semi-outdoor LED display, each kind of installation environment light is different, so must not install wrong, otherwise it is not too bright or too dark. So what do you need to pay attention to during the installation of the LED display screen? It can be summarized as follows:
(1) the size of the frame material is determined by the size of the finished product, but it is also subject to the specification of the unit board, so pay attention to the width of the aluminum alloy frame when cutting, because there are two left and right sides, so when cutting up and down the two transverse materials, you should subtract twice the width of the aluminum alloy frame from the specifications of the finished product, and the left and right vertical materials should also take care of this.
(2) the corner part is connected with plastic connectors, and finally fixed firmly with self-tapping screws. Four screws are used in one corner, one on each side, and the unit board can be placed after the frame is connected.
(3) the unit board should be placed according to its own finished product specifications. The specification of 4.8 to 0.48 needs to be arranged in horizontal 15 and vertical 3. Pay attention to the placement of the unit board in accordance with the direction of the arrows on the unit board.
(4) screw the special screws onto the unit board, absorb all the magnetic columns, and screw the screws near the left and right sides of the frame on the inner row of the unit board, so as to fix the back strip on the side.
(5) to install the back strip, the two ends of the back strip should be pre-punched, with two holes at one end and a total of four holes on one end, fixed with self-tapping screws and side frame material, and finally let the magnetic column on the unit board be adsorbed on the back strip.
(6) the unit board is connected with a data line, one end of the data line is inserted on the socket on the left side of the unit board opposite to the right side, and then the other end is connected to the socket on the left side of the adjacent unit board on the right side over the back strip. Connect one by one.
(7) the connection of the power lines between the unit boards, the red wire is connected to the ACC end on the unit board, and the black wire is connected to the GND end on the unit board. Connect one by one and be careful not to get confused.
Copyright ©2021 Shenzhen Lighting Technology Co., Ltd. All rights reserved Guangdong ICP preparation:No. 123456789